Importance of Capturing the Perfect Shot
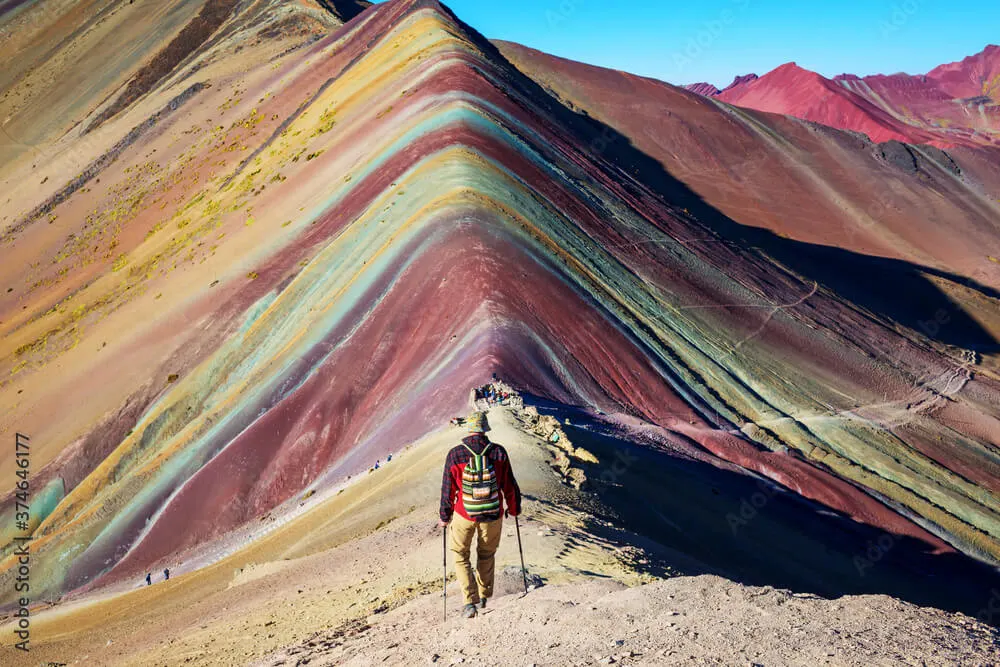
Rainbow Mountain, or Vinicunca, is one of Peru’s most stunning natural wonders, drawing photographers and travelers from around the globe. With its vibrant colors and breathtaking landscapes, capturing the perfect shot at this iconic location is essential for any photography enthusiast. Whether you’re a seasoned professional or an amateur with a smartphone, understanding how to photograph Rainbow Mountain can elevate your travel experience and allow you to share its beauty with others. In this guide, we’ll explore the best times to photograph Rainbow Mountain, essential gear to bring, composition tips, and editing techniques to enhance your photos.
Table of Contents
Best Time of Day to Photograph Rainbow Mountain
Lighting Conditions for Optimal Photos
The time of day you choose to photograph Rainbow Mountain can significantly impact the quality of your images. Here are some key considerations:
- Golden Hour: The best time to capture stunning photographs is during the golden hour—shortly after sunrise and before sunset. During these times, the sunlight casts a warm glow on the mountain’s colorful layers, enhancing their vibrancy and depth.
- Mid-Morning: If you miss the golden hour, mid-morning (around 9 AM to 11 AM) can also provide good lighting conditions. The sun is higher in the sky, illuminating the colors without harsh shadows.
- Avoiding Harsh Midday Light: The harsh midday sun can wash out colors and create unflattering shadows. If you must shoot during this time, look for shaded areas or use filters to soften the light.
- Weather Considerations: Clear skies are ideal for photography; however, if clouds roll in, they can add drama to your shots. Be prepared for changing weather conditions, as they can affect lighting and visibility.
Read more about:Best Time to Visit Rainbow Mountain Cusco
Essential Gear for Photography at Rainbow Mountain
Cameras, Lenses, and Accessories to Bring
Having the right gear is crucial for capturing high-quality images at Rainbow Mountain. Here’s a list of essential equipment:
- Camera: A DSLR or mirrorless camera will give you more control over settings like aperture and shutter speed. However, even high-quality smartphones can capture stunning images if used correctly.
- Lenses: If you’re using a DSLR or mirrorless camera, consider bringing a wide-angle lens (16-35mm) to capture expansive landscapes and a telephoto lens (70-200mm) for detailed shots of specific features.
- Tripod: A sturdy tripod is essential for long-exposure shots and ensuring stability in windy conditions. It’s particularly useful during sunrise and sunset when light levels change rapidly.
- Filters: Polarizing filters can help reduce glare and enhance colors in your photographs. Neutral density filters are also useful for long-exposure shots during daylight.
- Extra Batteries and Memory Cards: Cold temperatures at high altitudes can drain batteries quickly, so bring extras along with sufficient memory cards to store your images.
How to Frame the Perfect Shot: Composition Tips
Angles, Perspectives, and Focal Points
Composition plays a vital role in photography; it determines how viewers perceive your images. Here are some tips for framing stunning shots at Rainbow Mountain:
- Use Leading Lines: Look for natural lines in the landscape that draw the viewer’s eye into the photo. This could be pathways or ridges that lead toward the mountain.
- Rule of Thirds: Position key elements of your composition along imaginary lines that divide your frame into thirds (both horizontally and vertically). This technique creates balance and interest in your photos.
- Experiment with Angles: Don’t be afraid to get low or find higher vantage points to capture unique perspectives of Rainbow Mountain. Different angles can reveal new details and enhance visual interest.
- Include Foreground Elements: Incorporating elements in the foreground—such as rocks or wildflowers—can add depth to your images and create a more immersive experience for viewers.
- Capture Human Elements: Including people in your shots provides scale and context while showcasing the beauty of nature alongside human exploration.
Editing Your Rainbow Mountain Photos
Post-Processing Tips to Enhance Colors
Editing is an essential part of digital photography that allows you to enhance colors and correct any issues from your original shots:
- Software Options: Use software like Adobe Lightroom or Photoshop for editing your photos. These programs offer powerful tools for color correction and enhancement.
- Adjust Exposure and Contrast: Fine-tune exposure levels to ensure details are visible in both highlights and shadows. Increasing contrast can help make colors pop.
- Enhance Saturation: Be cautious with saturation; while it’s tempting to boost colors dramatically, subtle adjustments often yield more natural-looking results.
- Sharpening Details: Apply sharpening techniques selectively to enhance textures without introducing noise into your images.
- Crop Thoughtfully: Use cropping tools to improve composition by removing distractions from the edges of your frame or adjusting focal points according to the rule of thirds.
Conclusion: Making the Most of Your Photography Adventure
Capturing stunning photographs of Rainbow Mountain requires careful planning, timing, and an understanding of photography techniques. By choosing the right time of day for optimal lighting conditions, bringing essential gear, applying effective composition strategies, and editing thoughtfully, you can create breathtaking images that showcase this natural wonder’s beauty.Whether you’re sharing these photos on social media or creating lasting memories in a photo album, following these tips will help you make the most of your photography adventure at Rainbow Mountain.
So grab your camera, embrace your creativity, and prepare to capture one of Peru’s most spectacular landscapes!

